Saturday, November 29, 2014

Creamy Butter Frosting

This is a recipe I use to ice cakes, cookies, or even as "glue" for gingerbread houses.  It's very similar to vanilla frosting, but has an even better taste--and look--because the secret ingredient I use (which is no longer a secret) is almond extract. Most recipes use vanilla extract and let's face it, vanilla extract is brown...which means your icing is going to take on a brownish or, at the very least, an off-white tinge. Almond extract is clear, so your icing (especially if you use shortening in place of butter) will be much whiter as a result and I absolutely prefer the taste of almond extract in icing than vanilla.


Ingredients:

9 c. confectioners sugar
2/3 c. butter (or shortening--your choice)
1/2 c. milk
1 tsp. almond extract (can be real or imitation extract--both work well)


In a mixing bowl, beat the butter until it is creamy. Add about 4 cups of the confectioners sugar and let it mix on a low speed. Once the sugar is mostly incorporated, go ahead and add in the milk and almond extract.  You'll have a fairly runny frosting at this point.


Add the remaining confectioners sugar and allow it to mix well. More than likely, the frosting will be too thick to work with for most baked goods at this point. But if you need a super thick frosting, this is the point where you will get exactly that.


I like my frosting to be a bit thinner and easier to spread, so I add the necessary amount of milk to thin it to my liking. Remember, it doesn't take much liquid to make this frosting get too thin, so add a little bit at a time. I added approximately 1 tablespoon to reach the consistency I wanted/needed for our gingerbread house.  If I were going to use this frosting on a cake, I would add closer to 2 tablespoons.


Even if you do end up adding too much milk, you can fix it by adding more confectioners sugar to the bowl. Play around with the recipe and see which consistency you like...thick or thin, it tastes great!

Gingerbread

Nothing says Christmas is just around the corner better than the smell of freshly baked gingerbread. As with most things, homemade gingerbread is far superior in taste and texture to the pre-made variety at the grocery store. Think crispy on the outside, yet tender on the inside. This is not a difficult recipe to make and you won't regret a second of the time you use to put this together! Best of all, it makes the most fantastic gingerbread houses if you have a mold (we got ours via Amazon; link to product will come later in the post) and is something the whole family can enjoy working on together!


Ingredients:

1 c. butter (2 sticks)
1/2 c. brown sugar
2/3 c. light corn syrup
1/3 c. molasses
1 1/2 Tbsp. ground ginger
1 tsp. cinnamon
1 tsp. nutmeg
1/2 tsp. ground cloves
4 c. flour

Oven temperature: 350 degrees
Baking time: 22 minutes


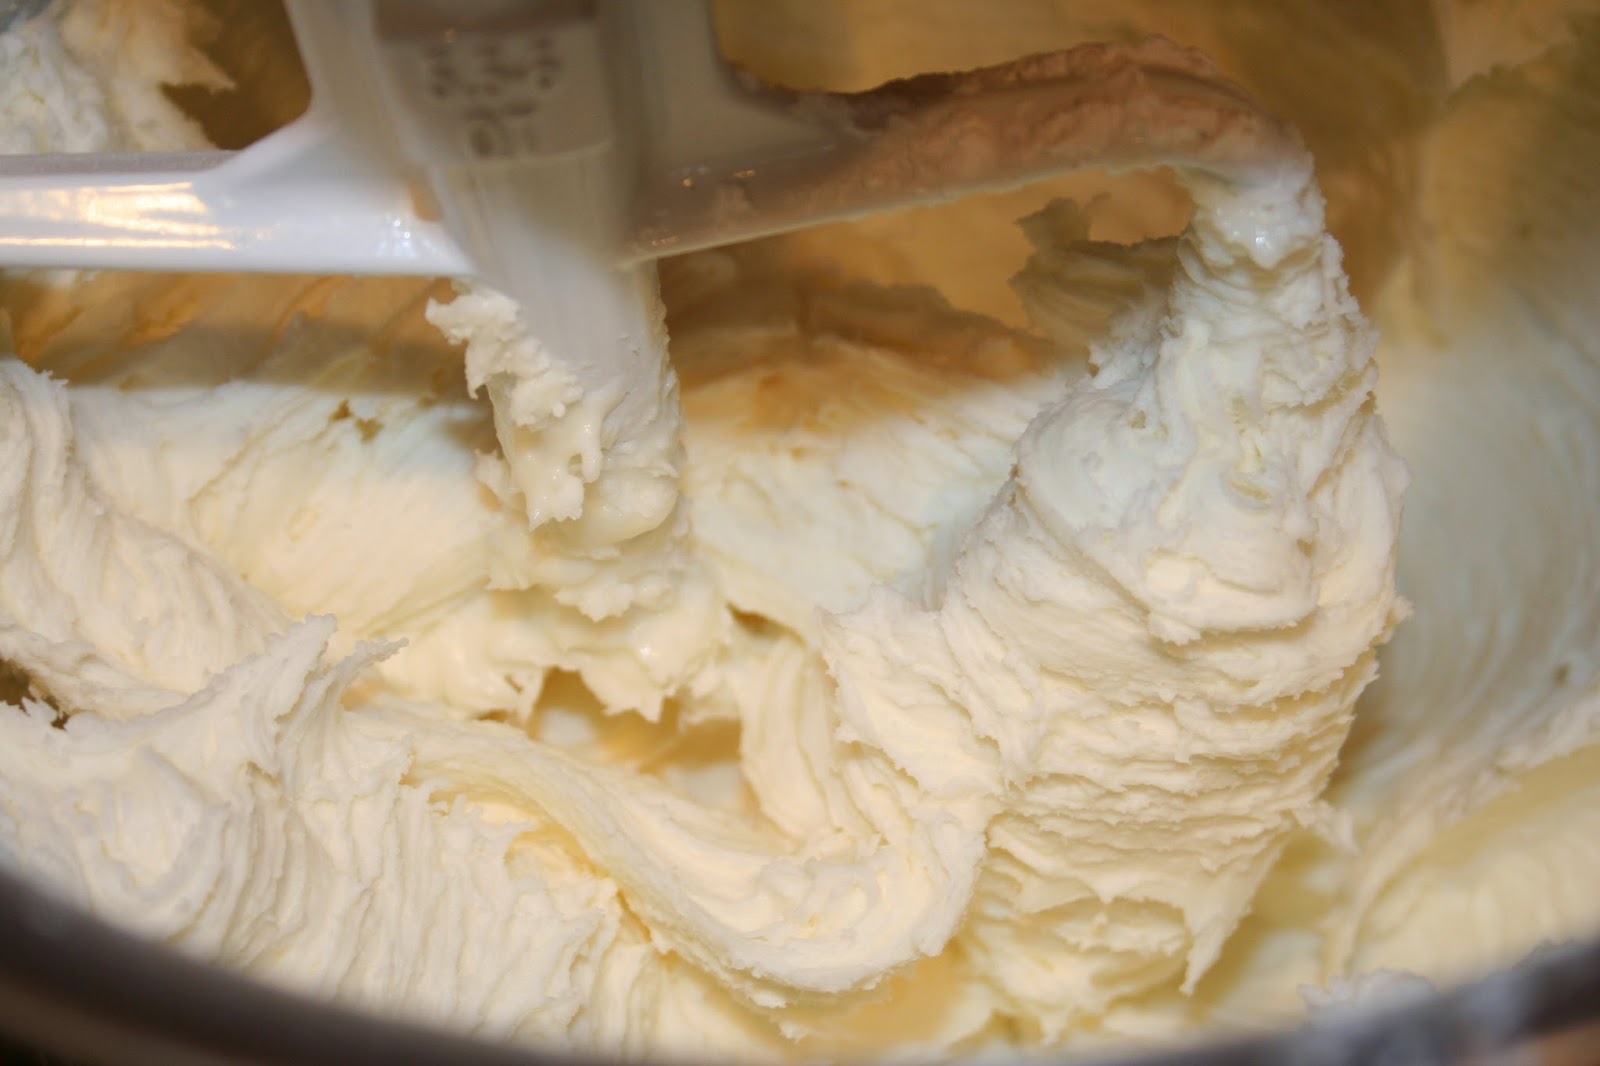
In a mixing bowl, combine the butter, sugar, syrup, and spices and mix for about 2 minutes, until well-combined. Add in the flour, mixing until the dough forms a ball.

Once the dough has combined, remove it from the mixing bowl, and shape it into a ball. Cut it into 4 equal pieces.  At this point, you can go ahead and press the dough onto a cookie sheet if you are baking a free-form kind of gingerbread, making sure that the dough is spread evenly across the baking pan.

However, you may choose to use a gingerbread mold, such as this one:


(It can be found on Amazon using this link here: http://www.amazon.com/Freshware-CB-700RD-Gingerbread-House-Silicone/dp/B003XT8HUK/ref=sr_1_2?ie=UTF8&qid=1417310309&sr=8-2&keywords=ginger+bread+house+mold)

If you are using the above mold, or one similar to it, go ahead and prepare to cut the dough a bit further. You'll take 3 of the 4 pieces you've already cut and divide them in half once again, leaving you with 6 smaller dough balls and one larger one; the one you didn't cut. Using the remaining original piece of dough, roll it into another ball and cut it into 4 pieces. You'll then take these 4 pieces and add them to 4 of the 6 balls of dough you had already set aside. Keep track of which 2 sections of dough you did NOT add the extra dough to--these will be the smaller areas of dough that you will use to make up the side walls of the gingerbread house.

Simply press the dough firmly into the mold, making sure the dough is pressed in evenly and is flat on top. You may have a little bit of dough left over, which is fine. Place the silicone molds on a cookie sheet to make the transfer from the counter to the oven (and back) easier. Place one cookie sheet on the upper oven rack, and one on the lower rack. **Bake for 11 minutes, then switch the sheets so that the bottom one is now on the top rack and vice versa. Continue to bake for 11 more minutes.

Once the 22 minutes are up, go ahead and remove the gingerbread from the oven and allow it to cool for about 10 minutes before transferring it from the mold directly to a cooling rack.


As the dough cools, it will become firm on the outside, yet remain nice and soft on the inside. Once the gingerbread is fully cooled off, you can go ahead and build it as a house, using my delicious frosting as glue.

Have a blast putting this together with family and friends!

Thursday, November 27, 2014

Best Ever Pecan Pie

I used to think pecan pie was gross. It was a cold, gelatinous dessert that I wanted to like, but just couldn't get past the "cold" and "gelatinous" part. I realized what I didn't care for was the corn syrup in the pie recipes that everyone used. Enter the "Best Pecan Pie Ever." Rather than working with corn syrup, you use eggs, butter, and sugar and wind up with a delicious dessert that is neither cold, nor gelatinous! So, if pecan pie has never been your thing, give this recipe a try--you may find out you like it quite a bit, as I did. And if pecan pie has always been your thing, still give this recipe a try--I bet you'll like it even more! :)


1 c. brown sugar
1/4 white sugar
1/2 c. butter, melted
2 eggs
1 Tbsp. flour
1 Tbsp. milk
1 tsp. vanilla
1 c. chopped pecans
1 pie crust

Oven Temperature: **note these baking times and temps!** Preheat oven to 400 degrees; bake pie for 10 minutes. Turn oven temp down to 350 degrees and continue to bake another 30-40 minutes.

Start out by coarsely chopping up the pecans. I have one of those old-fashioned hand-cranked grinders that I like to use and it's easy enough for the kids to use, too.

Before:

 After:


Place 2 eggs in a medium-size bowl and beat until they are foamy.


Add the melted butter, stirring carefully as you add it. Make sure your butter is not too warm--you don't want to wind up cooking the eggs!

At this point, add in the sugars and flour, stirring well until combined and smooth. You will wind up with a thick "batter."


Finally, add the milk, vanilla, and pecans, stirring until well combined. Take the mixture and pour it into an unbaked pie crust, then bake according to the above directions. Don't forget that this pie requires 2 different baking temperatures.


Once the pie has cooled a bit, go ahead and serve it up. Hope you enjoy it!

Sunday, November 2, 2014

Ranch Dressing

I think ranch is my favorite salad dressing. But my discriminating taste buds don't care for the bottled variety you can buy at the store. Call me a salad dressing snob; I will wear the title proudly. Because after all, I have a homemade version of ranch dressing that can be easily made and tastes SO good compared to the stuff in a bottle. I played around with a basic ranch dressing recipe and spiced it up just a little bit, although you can leave those spices out if you just want a traditional ranch flavor.


Ingredients:

2 c. mayonnaise (not Miracle Whip!!)
1 c. sour cream
1 tsp. onion powder
1 tsp. dried parsley
1 tsp. dill weed
1/2 tsp. garlic powder
1/4 tsp. sea salt
1/4 tsp. black pepper
1/2 tsp. cayenne pepper (can increase amount for extra spice or omit)
1/2 tsp. chili powder (can increase amount for extra spice or omit)
2-4 Tbsp. milk (add milk if you are wanting a dressing you can pour on, adding until you are satisfied with the consistency; leave it out if you want a thicker veggie dip)

Combine all of the above ingredients and stir well. Store in a bowl or jar and keep it in the refrigerator when not using. Tastes best when it can sit for at least 30 minutes in the fridge before using. Dressing will keep for up to 2 weeks in the refrigerator. Feel free to halve the recipe...we eat a lot of salads and veggies at our house, so we go through a larger amount relatively quickly.


Taco Seasoning

Tacos and other Mexican foods are pretty common fare around our house. Whether we're chowing down on chicken tacos or ones made with ground beef, flour tortillas or hard-shells, they all have one thing in common: taco seasoning.

I'm not one for buying packets of powdered seasonings if I can easily make them myself. I also like to be able to pronounce the names of ingredients in the foods I eat. Therefore, I decided it would be quite simple to create a homemade taco seasoning--you can make it as hot or as mild as you like, based on how much cayenne or red pepper flakes you choose to add to your mix.


Ingredients:
1 T. chili powder
1 1/2 t. cumin
1 t. sea salt
1 t. ground black pepper
1/2 t. garlic powder
1/2 t. dried oregano
1/2 t. paprika
1/4 t. red pepper flakes or cayenne pepper (can increase or decrease this amount to your liking)
1/4 t. onion powder


Combine all and stir well.


Store in an air-tight container (I use an old taco seasoning container). I use a funnel to eliminate spills while I transfer the seasonings from the bowl to the container.

***Use 3 Tbsp. seasonings per pound of meat. Add water (approx 2/3 c.), stir, and allow the seasonings to simmer in the meat.

Baking Powder

How many times have you had to run to the store to pick up a new canister of baking powder when you want to make pancakes or some other type of baked goods? The containers at the store are so small and you pay a decent amount for them, compared to the amount you receive in return. Add to that the fact that many of the baking powders contain aluminum and it makes you wonder if it's worth it in the first place.

Now for the good news: baking powder is a CINCH to make at home. All it requires is 3 simple ingredients and you can whip up a large, aluminum-free batch of baking powder right in your own kitchen. In fact, I find that the homemade version is far superior to its store-bought counterpart. Pancakes and biscuits rise much better, baked goods are just that much fluffier. And did I mention how simple it is to throw together?

Here are the game players in homemade baking powder:


Ingredients:

2 tsp. Cream of Tartar
1 tsp. Baking Soda
1 tsp. Corn Starch

The corn starch isn't an imperative ingredient--you can make baking powder using just the cream of tartar and baking soda, however, you run the risk of your baking powder getting clumped up from variations in humidity and temperature in your house. So, if at all possible, I would recommend adding corn starch to your baking powder.

Simply combine the above ingredients, stir together, and store in an air-tight container. I use an old baking powder container to store mine (with the recipe written right on it, perfect for when I need to make more).

I would also recommend buying the cream of tartar in bulk--it's relatively cheap and can be purchased either in the bulk section of your grocery store, or through a company such as Amazon.

Once you realize how easy and superior homemade baking powder is to the store version, you won't switch back!