Monday, March 17, 2014

Bagels

Last week I made bagels for the first time in my life.  I can't believe I waited so long to make them--they were so easy (as most bread things are) and tasted far superior to the ones you buy! That particular day I was in the mood for cinnamon sugar bagels, so that's what we had.  But I am anxious to try making all kinds of varieties--plain, poppy seed, sesame seed, onion, cheese...the list goes on!  Do yourself a favor and make these bagels.  You won't be disappointed!


Ingredients:

1 1/2 c. warm water
2 T yeast
3 T sugar
1 T salt
4 1/2 c. flour
Any toppings that you intend to use, such as cinnamon or sesame seeds, etc.

Add'l Ingredients:

At least 8 cups of water for boiling the bagels before baking
1 egg white + 1 T water, mixed to together, for an egg wash so you can then add whatever toppings you like.

Oven Temperature: 350 degrees
Baking Time: 35 minutes

In a glass measuring cup, combine the yeast, sugar, and water together and stir. Allow the mixture to stand for 3 minutes.

In a large bowl or stand mixer bowl, combine the flour and salt, mixing well.  Once the yeast has been activated, go ahead and add it to the bowl.  Mix until combined, then knead for 5 minutes.

Place the dough into a greased bowl, cover, and allow the dough to rise until doubled.

Punch down the dough.  If you are making cinnamon bagels, I added about 2 T of cinnamon to my dough and kneaded it in by hand at this point.

Divide the dough into 8 or 10 balls and allow them to rest for 5 minutes. (I always gently cover any bread dough that I work with, with a layer of plastic wrap to help retain the moisture. Don't press it down on top of the dough though--you don't want it to stick!)

After 5 minutes, it's time to shape the bagels.  Have a little flour nearby in case you need it. Using your thumbs, poke a hole in the center of the dough ball and stretch the ball into a bagel shape. Be fairly liberal in your stretching (not to the point that you tear the dough, of course), as the bagel will continue to rise and potentially close the center hole as it expands.  Try to make at least a 1 1/2" hole.  Place shaped bagels onto a baking sheet to rest (covered) for 10 minutes.


At this point you will want to have your large pot of water boiling--it's time to give your bagels a quick bath! They'll need to cook for about 45 seconds total and you will want to turn them halfway through that time period.  I used a pair of tongs to turn the bagels mid-boil, as well as to remove them from the water.  You'll also want to be prepared for when the bagels come out of the water. I set a couple of drying racks on 2 extra cookie sheets--that way the water (and eventual egg wash) could drip and drain as necessary.  Before baking, I transferred them to my favorite cookie sheets lined with parchment paper.

Now that your bagels have been boiled, it's time to use that egg wash.  Brush a generous coating of egg wash on top of each bagel and then sprinkle on whatever topping you are wanting to use.  This is when I added cinnamon sugar to the tops of my bagels.


Finally, it's time to bake the bagels.  As mentioned earlier, I used parchment paper to avoid any unnecessary drama of bagels sticking to my cookie sheets.  It worked wonderfully.  Halfway through the baking time, go ahead and rotate the bagels on the tray. Don't flip them over (unless you want all your toppings on the baking sheet instead of the bagels), simply lift and turn them a bit to ensure they aren't sticking to the pan and to allow the bottoms of the bagels a better opportunity to evenly bake.

Eventually they will be ready and your family will descend on the bagels like they've never eaten anything quite like them before. They were absolutely delicious, although if you can at all hold off on eating them until they are comfortably warm rather than burn-your-mouth-hot, you'll probably enjoy them even more! ;) Happy baking and even happier eating!


Chicken Salad

Today I wanted to make some chicken salad to put into the whole wheat flatbread I made the other day. Talk about a delicious combo! Chicken salad is so easy to make and it's nice to make as much as you want or need.  And you can add a variety of tasty things to it to suit your desires. This particular time I added celery and onion for crunch, a chopped up apple for a taste of sweet, and added a few peanuts for extra crunch and flavor just prior to serving. But you can change it up by including a different variety of apple or grapes, cashews or almonds, or go for the nothing-added version if that's what you prefer.  Have fun playing around with this recipe--you just can't go wrong!


Ingredients:

Boneless, skinless chicken breasts (or whatever chicken you have on hand)
Mayonnaise
Celery, chopped (optional)
Onions, chopped (optional, or may use onion powder in place of fresh)
Apple, chopped (or grapes, or whatever fruit you wish)
Salt, pepper, and garlic powder to taste
Nuts--any variety. **Note that you do not want to add the nuts to the chicken salad mixture unless you don't plan on having leftovers. The nuts have a tendency to get soft if they sit in the mixture for any length of time. It doesn't change the flavor, but I prefer them crunchy.

Start out by cooking your chicken. I usually boil a large pot of the boneless skinless variety on the stove.


Once the chicken is cooked through, you'll want to shred it. Up until recently, I used the 2-fork shredding method. Then my friend told me about this brilliant idea: place the cooked chicken (or any kind of boneless meat you may be working with for a particular recipe) in your stand mixer bowl and use the cookie paddle attachment to shred the chicken.  It works PERFECTLY and you don't have to wait for the chicken to cool down a bit before you can work with it!


Once the chicken is shredded, you can go ahead and start adding whatever you want to it. I tossed in my veggies and fruit first.


Next, add the mayo and whatever spices you are using.


Finally, serve it up on your favorite bread (or serve without bread!). Go ahead and add some lettuce or spinach if you want to sneak in some extra veggies.


Whole Wheat Flatbread

The other day I was out of bread and tortillas and needed to come up with something fast, as lunchtime was not far off and I had 4 hungry kids who were expecting a meal.  I decided to try my hand at flatbread and I was thrilled with the ease and speed at which these could be prepared, not to mention how great they taste great, too!


Ingredients:

3 c. whole wheat flour (I used freshly milled hard red wheat)
1 tsp. baking powder
1 tsp. salt
2 T olive oil
1 c. hot water (add more if your dough is dry)

If you have a stand mixer, these things are incredibly quick to mix up.  Place all your dry ingredients in the mixing bowl and give it a quick whirl to combine the ingredients.  Next, add the olive oil and hot water and mix it on low until a smooth dough forms.


Once you have a nice dough, divide it into 12 pieces (fewer if you want larger flatbread). Shape the pieces into balls and set them on a lightly floured surface. Cover them with plastic wrap so they don't dry out before you can get to them.

Working one at a time, place a dough ball onto a lightly floured surface or a pastry mat (I got mine through Amazon).  Flatten the ball with your hand, and then proceed to roll out to whatever size and thickness you want. I rolled mine out to tortilla thickness.  Keep in mind, this recipe has baking powder in it, which will allow the dough to rise a bit when it is cooked.


You'll be cooking these on a skillet, so make sure you have a skillet or griddle set to medium or medium-low heat and that it is nice and warm before you put your first flatbread on it.  Cook the flatbread for about 20-30 seconds per side. You want it to get slightly browned, but not too dark.


This recipe makes about a dozen flatbread rounds. Store in a plastic Ziploc-type bag to retain freshness. They will stay nice and soft for at least a week if stored this way. Serve with your favorite sandwich fillings--peanut butter, egg salad, chicken salad, or even as a breakfast dish, filling it with scrambled eggs and cheese, etc.   Note: to make tortillas, follow this same recipe, but omit the baking powder.

Creamy Coleslaw

I'm particular when it comes to coleslaw. Too vinegary and I don't care for it.  Too much of a mayonnaise taste and I will avoid it. Too sweet or not sweet enough and it won't do. This, however, is a recipe I enjoy. For me, it's just the right amount of all of the above and it's easy enough to change up the flavors in a way that you like. (For instance, if you like a sweet coleslaw, add extra sugar. Like it tangy? Add extra vinegar or lemon juice, try your favorite flavor vinegar such as apple cider vinegar in place of plain white vinegar, etc.)


Ingredients:

1 head of cabbage, sliced/chopped (or buy the pre-shredded cabbage in a bag)
1 carrot, shredded
1/2 small onion, finely chopped (omit and/or use onion powder if you don't care for fresh onion)
1/4 c. white sugar
1/2 tsp. salt
1/4 tsp. pepper
1 c. mayonnaise
1/2 c. buttermilk (regular milk also works fine)
3 T. vinegar (your choice; I often switch up white and apple cider)
5 T. lemon juice
garlic powder to your liking
salt and pepper to taste

Go ahead and chop and combine your veggies in a large bowl (or pour bag of coleslaw mix into the bowl).  Rather than grating my carrot, I use my veggie peeler and peel off slices that way, then cut them into shorter pieces. I'm sure this job would be even easier if you had a food processor, of course!


Next, in a large measuring cup, combine the remaining ingredients, being sure to whisk well until the ingredients are combined and the mixture is smooth.


Finally, pour the coleslaw dressing over the top of the cabbage mixture and stir well.  Cover and refrigerate for a few hours for best-tasting results. The dressing will thicken up a bit in the fridge. Every so often I'd suggest stirring the bowl of coleslaw so that dressing really soaks in instead of sinking to the bottom.  Perfect to serve as a side dish or as a topping to BBQ pulled pork sandwiches!


Monday, February 17, 2014

Soft and Cheesy Breadsticks

Breadsticks...soft, cheesy, warm, and fresh out of the oven.  They are so good!  This particular recipe can be prepared with so many different flavors that half the fun is playing around with flavor combinations.  Turn them into pizza sticks by adding pepperonis or sausage prior to the cheese.  Have fun with it and enjoy tasting the end result!


Ingredients:

Basic Bread Dough recipe
salt and pepper (to taste)
butter, softened (to spread over the top of the dough)
garlic powder
Italian seasonings
grated Parmesan cheese
additional seasonings/toppings
mozzarella cheese

Oven Temperature: 450 degrees
Baking Time: 10 minutes

Make the basic bread dough (or use your own favorite dough recipe) and then roll it out to fit on a cookie sheet.


Next, spread the softened butter across the surface of the bread dough.


Add your seasonings.  I started with plenty of garlic powder, some salt and pepper, then the Italian seasonings, and ended with the grated Parmesan cheese.


Top with shredded mozzarella cheese and place it in the oven.


Bake for 10 minutes, or until the cheese is slightly golden brown.  Remove and slice into the size breadsticks you want.  If desired, dip in marinara sauce.


Fudgy Frosted Brownies

I'm picky when it comes to homemade brownies.  I'm not a fan of cake-like brownies.  I do, however, love moist, fudgy brownies.  Even better when the recipe is a cinch to make.  Enter Fudgy Frosted Brownies.  Delicious!  If you need a chocolate fix, give this recipe a try!


Ingredients:

1 c. butter, softened
2 c. sugar
2 eggs
2 c. flour
1/2 c. baking cocoa

(frosting)
1/2 c. butter, softened
3 1/2 c. powdered sugar
1/3 c. baking cocoa
1/4 c. milk

Oven Temperature: 350
Baking Time: 25 minutes

In a large bowl, cream together the butter and sugar.  Add the eggs one at a time, stirring well after each. Add the flour and cocoa, then mix until well combined.  Batter will be sticky.

Place batter in an ungreased 9x13" pan and bake for about 25 minutes.  Once the brownies are done, allow them to cool on a rack for a while.

While your brownies are baking, you can go ahead and prep the frosting.  Once again, beat the butter until it is fluffy, then add the remaining ingredients, stirring well until a thick fudgy frosting has formed. Allow the brownies to cool for as long as you can stand it before spreading the frosting over the top. (Obviously the frosting will be runny if you add it to the brownies too soon!)  Cut into squares and enjoy!


Tuesday, January 21, 2014

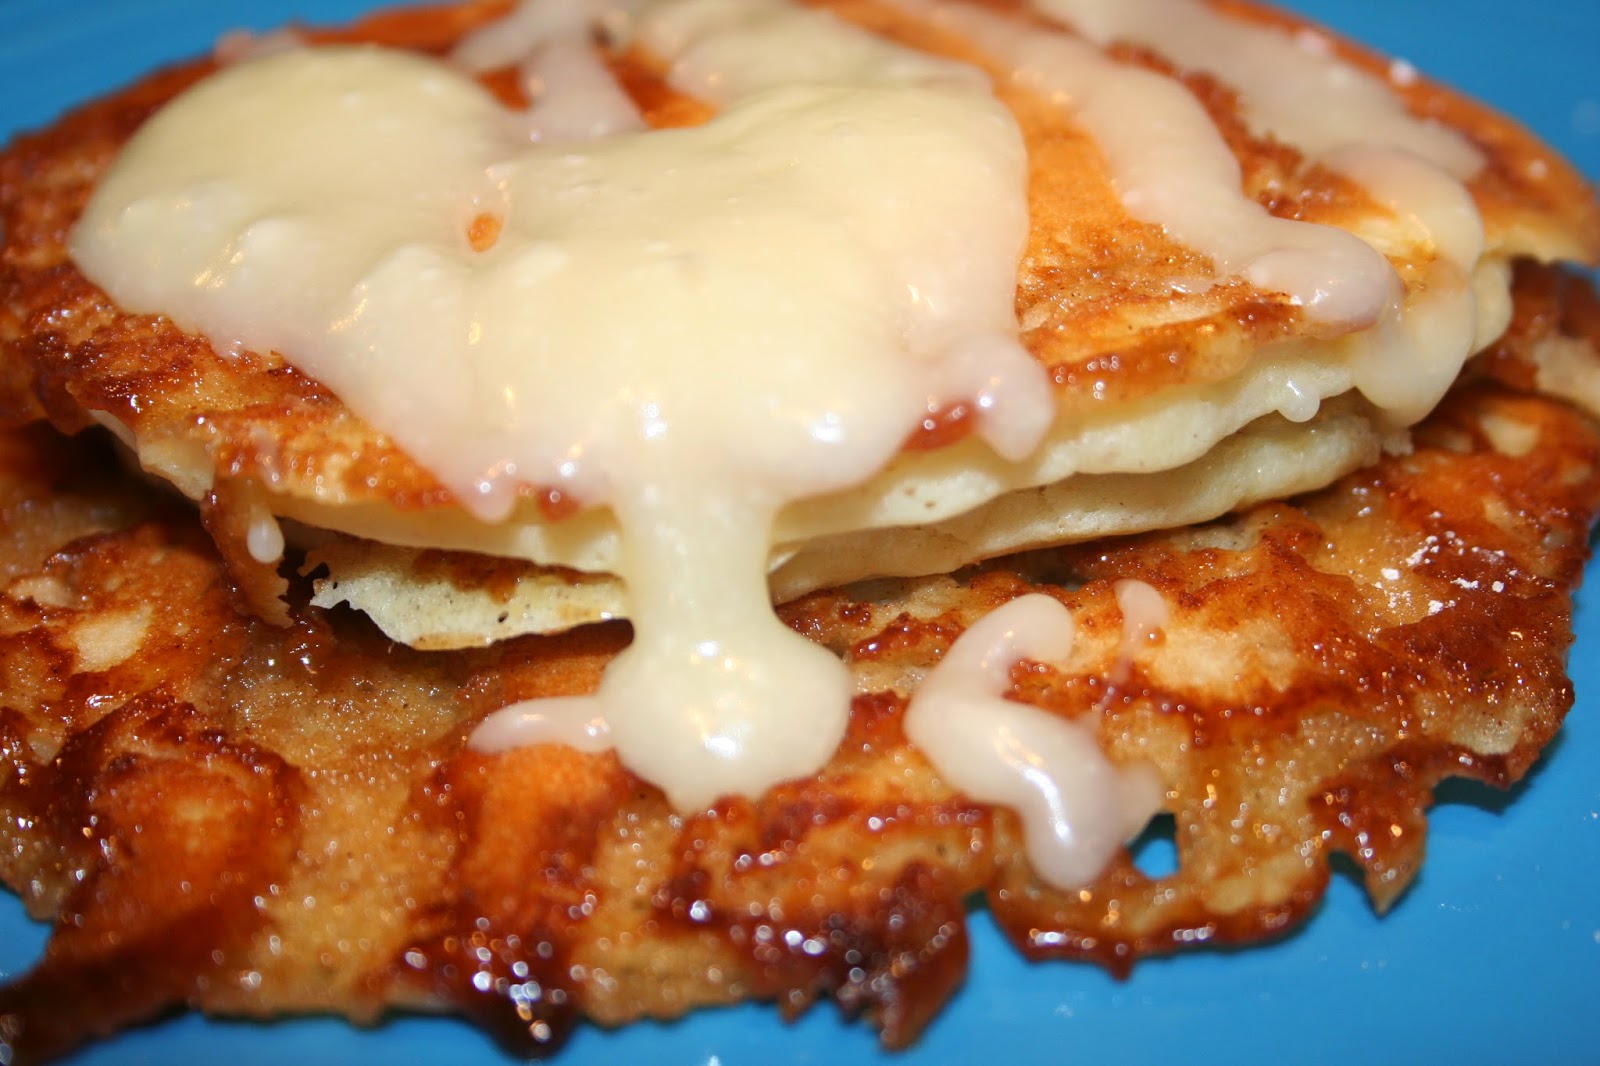
Cinnamon Roll Pancakes

Craving the cinnamon roll taste without all the work?  Try these cinnamon roll pancakes.  They are fast and pretty simple to make...and taste delicious!!


You'll have to whip up 3 different parts to this recipe, none of which is difficult.  There's the pancake batter, the cinnamon mixture, and then the icing to drizzle on the top.

Pancake Ingredients:

2 c. flour
4 tsp. baking powder
1 tsp. salt
2 c. milk
2 eggs
2 Tbsp. vegetable oil

Cinnamon Mixture:

1 stick of butter, melted
3/4 c. packed brown sugar
1 tsp. cinnamon

Icing:

(Fast version)--powdered sugar thinned out by milk to your desired thickness for drizzling; can add a splash of vanilla

(Slower version)--1 stick of butter, 4 oz. cream cheese, 1 1/2 c. powdered sugar and a splash of vanilla

Before making this recipe, there are a few tips I want to provide for you so that your experience is a good one.  First of all, I highly recommend using a flat griddle meant for pancakes.  Secondly, heat the griddle in advance, but only heat it to (and keep it at) a med-low setting or else you will risk burning the cinnamon sugar mixture on your griddle. Wait until the pancakes have "set" and are bubbly before adding the cinnamon mixture to the top of them, or else the cinnamon mixture will immediately run off onto the griddle, leaving you with a bit of a mess.  If necessary, you can easily clean the surface of your griddle between every few batches of pancakes if the cinnamon mixture starts to get messy.  You may need to run hot water over your spatula if the cinnamon mixture sticks to it and starts to build up a sugary layer.

Don't let the above tips deter you from wanting to try these pancakes; they're delicious!  And I'm just sharing what I've learned via trial and error so that you will have a less "exciting" time making these pancakes yourself! :)

The first thing I do, is to get the cinnamon mixture ready to go.  Microwave the butter until it's melted, then add the brown sugar and cinnamon, stirring well.


You might want to get the icing started at this point, too.  Especially if you're using the more involved recipe (which is worth it!).  For that one, simply melt the butter in a pan over low heat, add the softened cream cheese until it's more or less melted, then add the powdered sugar and vanilla, stirring until a smooth icing has formed.  Keep the icing warm so that you are able to drizzle it over the pancakes.

Next you'll want to put together the pancake batter.  Combine the dry ingredients, stirring them up until they are combined, then add the wet ingredients, stirring until the batter is fairly smooth.  There will be some small lumps, but that is okay.

Place the pancake batter on your preheated griddle:


While the batter starts to cook, place the cinnamon mixture into a Ziploc bag.  I typically use the gallon-sized freezer bags as they are thicker and less likely to break right in the middle of use.  Once the pancakes have set a bit and are bubbly on the top, you'll want to add the cinnamon mixture to the top of the pancakes.  Snip a small corner from the Ziploc bag and use that to dispense the cinnamon.


It's fun to watch the cinnamon swirl start to melt into the pancake as it cooks.


Once the pancake looks fairly "dry" at the edges, go ahead and carefully flip the pancakes so that the other side can be cooked.  Once that's done, it's time to place the pancake onto a plate and drizzle it with the icing.


Drizzle with the icing and serve it up to your happy family! :)