Saturday, September 14, 2013

Creamy Ham, Potatoes, and Peas

A fast, filling, and yummy comfort food...if you don't mind various foods mixing in with one another. This is an extremely simple recipe to throw together.


Ingredients:

Potatoes, cubed--any kind and as much as you want (red potatoes don't need to be peeled. I used Yukon gold.)
Ham--cubed, as much as you like
Peas--1 lb. frozen bag**read below for how I use the peas in this particular recipe.
White Sauce

In a large pot, boil cubed potatoes until they are tender.  While the potatoes are cooking, go ahead and make the white sauce.**When ready to drain the potatoes, pour the frozen peas into a colander and drain the potatoes over the top of them; this will effectively cook the peas in an instant.  Place the peas and potatoes back into the large pot and add in the ham.  By this time, your white sauce should have thickened up.  Simply pour the white sauce over the ham, potatoes, and peas, stir it all up, and serve!


Rocky Road Fudge Bars

This afternoon my daughter and I were trying to come up with a fun dessert to make.  She was hoping for something along the line of s'mores, but I didn't have any graham crackers on hand.  So I started to brainstorm about what we could make that would be almost as good as s'mores and this is what I came up with.  The base of the recipe is very similar to my chocolate haystacks, however, instead of adding peanuts and chow mein noodles, this time I added peanuts and marshmallows.  The whole family gave this recipe a big thumbs up and I do, too, based on the ease of making it as well as the taste!


Ingredients:
2 Tbsp. butter
1 c. peanut butter
2 c. chocolate chips
1 c. salted peanuts (I used cocktail peanuts)
2 c. marshmallows (mini marshmallows are best/easiest)

Refrigeration time: 1-2 hours; the chocolate melts on your fingers a bit faster if you only refrigerate them for one hour.

Start out by placing the butter, peanut butter, and chocolate chips in a medium-size saucepan over low heat.


At this point (see photo below), I remove the pan from the heat.  You want to heat up the mixture so that the chocolate chips melt, but not too much that you end up melting the marshmallows.


Continue to stir until mixture is smooth.


Next, add in the peanuts and marshmallows.  A special note about the marshmallows: mini marshmallows would be the best to work with.  However, if you only have large marshmallows on hand, as I did, I would suggest quartering the marshmallows and coating the sticky sides lightly in powdered sugar.


Once the peanuts and marshmallows have a nice coating of chocolate on them, pour them into a glass 9x13" (or slightly smaller) pan.  I used my 8 1/2 x 11" pan because I wanted thicker bars.  Refrigerate for 1-2 hours, cut into bars, and serve!  Don't forget the napkins! ;)


Saturday, July 27, 2013

Tortilla Pie

This is a simple yet tasty 6-ingredient Mexican-style dish that was given to me years ago by a neighbor.  You can make it as spicy as you want depending on the "heat" of the salsa you use.  Tastes great as a vegetarian/meatless dish, however, you can add in chicken if you prefer a different flavor.

  
Ingredients:
1 jar of salsa (I use medium spiciness)
1 can (8 oz.) tomato sauce
1 can (15 oz.) black beans, rinsed and drained
1 can (15 oz.) corn, drained (I don't like canned corn, so I measured out approx. 15 oz. of frozen corn)
4 tortillas (10" is the best size)
6 oz. shredded cheese (Monterey Jack, Cheddar, Mexican; you choose)
sour cream
**chicken, cooked and shredded or cubed, can be added to this recipe if desired.

Baking Temperature: 500 degrees
Baking Time 10-12 minutes, until top is golden and cheese melts in the middle layers

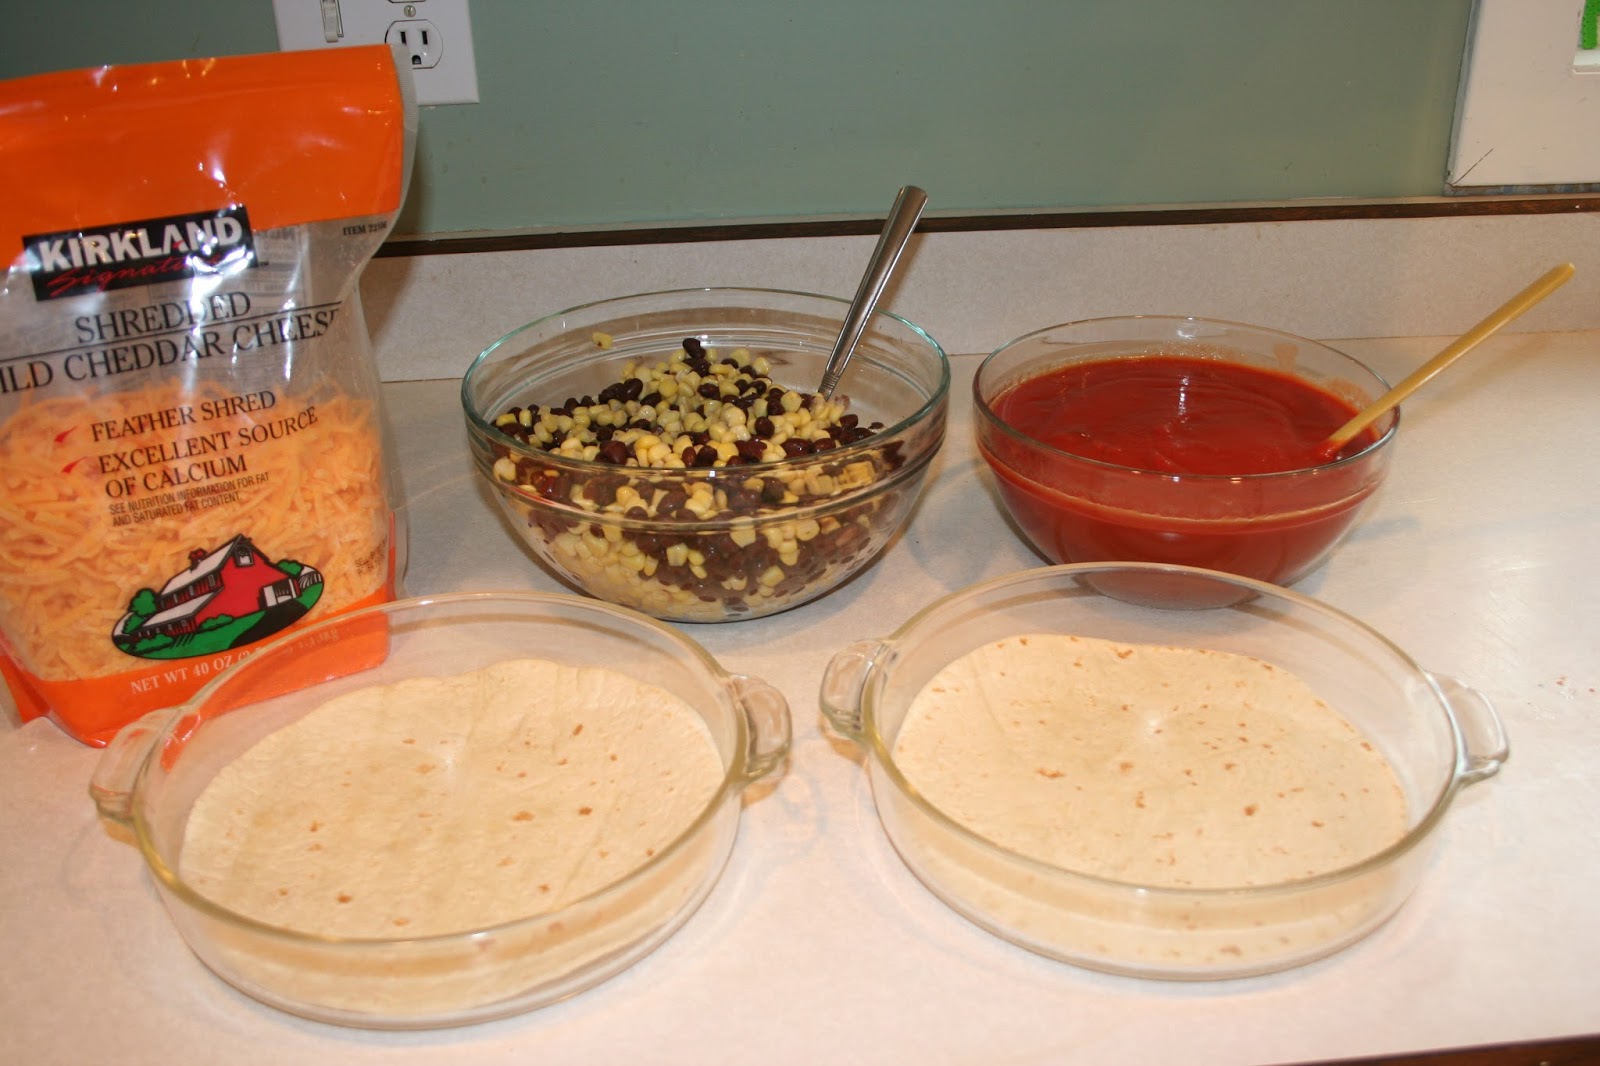
Gather all your ingredients.  (You'll notice double the ingredients in my picture as I doubled the recipe.)


In a small bowl, mix salsa and tomato sauce.  In a medium bowl, mix beans and corn.


Place 1 tortilla in your baking dish (you can bake this in any pan; I prefer a round cake pan).  Spread 1/3 of the salsa/tomato mixture on top of it, followed by 1/3 of the bean/corn mixture, then sprinkling with 1/3 of the cheese.  Top with another tortilla and repeat this process 2 more times, ending with the last tortilla.


Place in the preheated oven and bake.  If the top tortilla starts to get too brown yet the filling is not warm enough, you can simply cover the top of the dish loosely with a piece of tin foil.  By the way, the top tortilla shrinks a bit!


After baking, allow the dish to sit for about 5 minutes.  At that time, you can cut into it and serve it up.  Garnish with some sour cream and enjoy!


Friday, July 26, 2013

Strawberry Muffins

A simple, sweet, easy, fast and delicious recipe to use up fresh (or frozen) strawberries!  I've always put blueberries in muffins, but the other day I had strawberries on hand and decided to give them a try.  They were wonderful!!


Ingredients:

1 2/3 c. fresh (or frozen) strawberries
2/3 c. sugar (can use less if you prefer)
1/3 c. vegetable oil
2 eggs
1 1/2 c. flour
1/2 tsp. baking soda
1/2 tsp. salt
1/2 tsp. cinnamon

Baking temperature: 425 degrees
Baking time: 15-18 minutes

Start out by preheating your oven and spraying the bottoms only of the muffin cups with a non-stick spray.


Measure out your strawberries; if you can't get exactly 1 2/3 c. of berries, that's okay.  Mine ended up measuring pretty close to 2 cups and they turned out just fine.


Pour the berries into a large bowl and mash the berries.  This is a good time to get a young assistant in on the fun! ;)


Next, add the sugar and stir it in.


Pour in the oil and add the eggs, stirring well.


Now you're going to add the dry ingredients.  I simply measured them out and poured them on top of the strawberry mixture, then stirred it all together until no dry areas remained.


Fill 12 muffin cups 3/4 or so of the way full with the batter.


Bake the muffins until they are lightly browned on top.  You can always stick a toothpick in them to see if they are done or not if you are unsure.


Allow the muffins to cool for 5 minutes in the tin, then use a spoon to gently loosen the sides of the muffins and remove to a cooling rack.


Cut into them, spread with butter if you like, and enjoy!


Wednesday, July 3, 2013

No-Bake Cheesecake

I found this recipe years ago, I think through the Kraft company.  It's one of my favorite summer desserts.  Pair it with the graham cracker crust recipe and you have perfection!  I like that it's a bit lighter than a standard cheesecake.  I am not a huge fan of cheesecake--I can eat a little of it and am happy to be done--but this I can easily eat a full slice!


Ingredients:

2 packages (8 oz. each) cream cheese, softened
1/3 c. sugar
2 Tbsp. lemon juice
1 small tub of Cool Whip, divided
1 graham cracker crust (see the highlighted link above for the best crust recipe!)
Strawberry halves
Blueberries

Start out by by beating the cream cheese, sugar, and lemon juice in a large bowl until well-blended.


Gently stir in 2 cups of Cool Whip.


Spoon this mixture into the (cooled) pie crust and spread evenly.


Refrigerate for 3 hours, or until the mixture has set.  (I tend to forget about the need to refrigerate this recipe...and I've discovered it's not a big deal.  It still sets up well and tastes great!)

After allowing the cheesecake to cool for a bit, spread the remaining Cool Whip on top.


Now it's time to add some berries!  (Feel free to use your favorites)


If you're using strawberries, cut them in half.


Go ahead and decorate the cheesecake however you wish.  Create your own pattern.  If you live in the U.S., you can make it resemble the flag if you like.  Refrigerate until ready to serve.