I had these treats not quite a year ago at a friend's house. Enjoyed them, but never gave them another thought...until yesterday. Suddenly, I really wanted to have some! So, I attempted to make them myself and they turned out pretty good! Even better with M&M's! ;) The best part is that there are only 4 ingredients and the finished product can be ready in under 15 minutes!
Ingredients:
2 c. raw almonds
2 Tbsp. agave nectar
pinch of salt
2 Tbsp. cocoa powder
M&M's (optional)
Baking temperature: 350 degrees
Baking time: 10 minutes
Here are the ingredients I used:
Start out by pouring the 2 c. of almonds into a small bowl. Add the 2 Tbsp. agave nectar and stir until all the almond pieces are coated.
Next, line a cookie with parchment paper and pour the almonds on top.
Spread the almonds out a bit so they're not in one big clump.
Bake for 10 minutes, stirring the almonds around a bit at least twice during the baking time.
Immediately after baking, place the almonds into a bowl, add the cocoa powder, and stir/shake to coat.
I found that doing an initial chocolate coating, followed by spreading the almonds out and allowing them to fully cool, and then doing one last coating (I placed the almonds in a ziploc bag and shook them up) provided the best results.
M&M's are optional...I find that 2 M&M's to one almond is the perfect ratio! ;)
Caution: Sneaking cocoa almonds doesn't work for some people...the evidence is written all over her face!
Thursday, May 16, 2013
Simple Grilled Barbecue Chicken
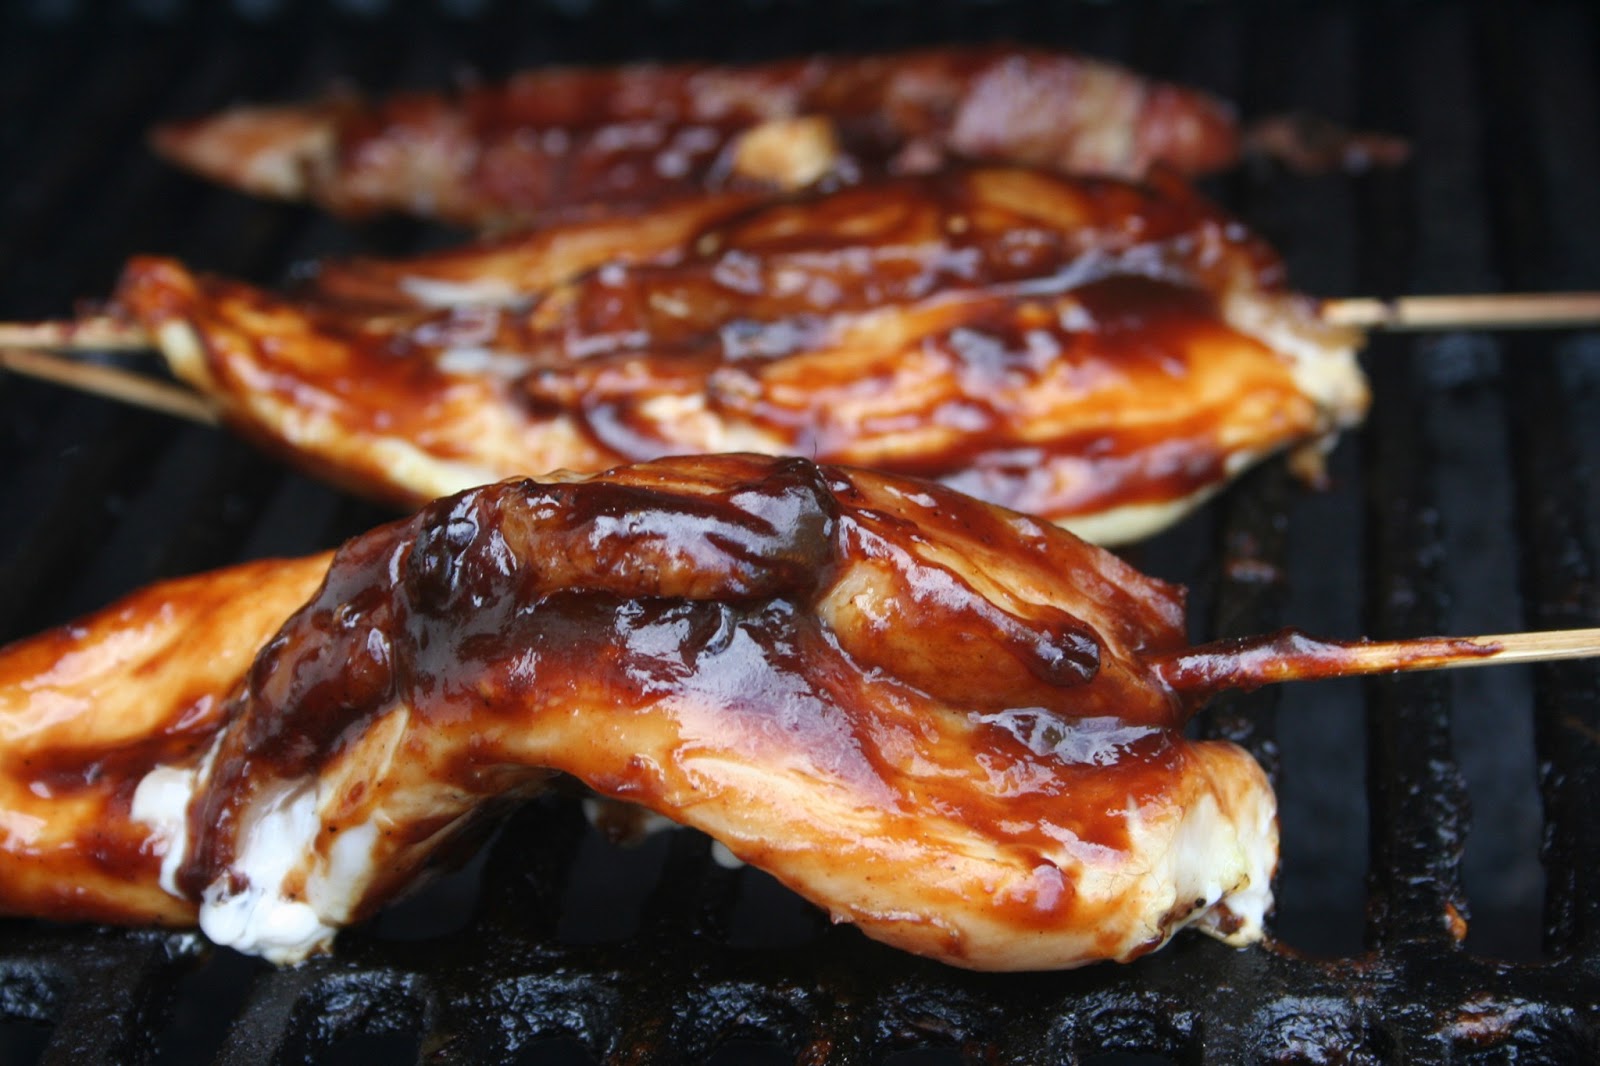
One of the best parts about summer is grilling food! I think pretty much anything tastes great on the grill. Last night I wanted to take our normal grilled chicken up a notch in flavor. I found one last package of thick cut bacon in my freezer, so I thawed it out and skewered it to boneless skinless chicken breasts. I had my husband use a lot of barbecue sauce, basting the chicken generously each time he turned it. Once it was done, we topped it off with a little shredded cheddar cheese. Delicious!
Ingredients:
4-6 chicken breasts
4-6 (or more!) slices of bacon
barbecue sauce
shredded cheddar cheese (optional)
skewers for keeping the bacon in place, unless you prefer to wrap it around. (Our bacon slices were short and fat, so I had to use this method.)
Ingredients:
4-6 chicken breasts
4-6 (or more!) slices of bacon
barbecue sauce
shredded cheddar cheese (optional)
skewers for keeping the bacon in place, unless you prefer to wrap it around. (Our bacon slices were short and fat, so I had to use this method.)
Guacamole
When it comes to guacamole, I feel that less is more. The fewer things you have to add to it, the better. Serve it up with chips or use it with tacos!
Ingredients:
Avocados
Red onion
Tomatoes (optional)
garlic powder (to taste)
salt (to taste)
Go ahead and cut into your avocado. If you're not familiar with avocados, you want to choose one that is more brown than green in color. Green avocados are firm and not ripe. But be careful--if they are too brown and squishy, they are overly ripe and will not taste good. Try to find one that is somewhat firm, yet gives a bit when gently squeezed.
This one is just perfect!
Spoon out the meat of the avocado with a spoon into a bowl. To remove the pit, simply give the avocado half a gentle squeeze and it should pop right out!
Next take a fork or a potato masher and mash the avocados until you have a somewhat creamy yet lumpy mixture.
Add your onions (and tomatoes) at this point, and mix them in.
Place the seasonings in and stir until they are well combined.
At this point, you can serve it up right away, or if you need to wait, you have a couple of options. I know some people use lemon or lime juice to help preserve the green color of their guacamole. I simply use a sheet of plastic wrap that I place directly on top of the guacamole so that the air can't get to it and turn it brown. Go ahead and choose whichever method you prefer and then place it in the fridge until you need it. Enjoy!
Cracker Bread
This is a basic unleavened bread recipe. It's great to use if you want a thin crust pizza that is crispy and cracker thin--we use it for that purpose all the time! But yesterday I just wanted to have some flavored crackers on hand to enjoy with some guacamole. So, enter flavored cracker bread...you can season it to meet your favorite flavors. On this particular day, I simply used salt and garlic powder. But the possibilities are endless--there are options ranging from savory to sweet!
Ingredients:
1 c. water
2 T. olive oil
1 tsp. salt
3 c. flour
seasonings (your choice)
Baking temperature: 450 degrees
Baking time: 20 minutes
You'll start by placing the first 4 ingredients in a mixer and mix it until a rough dough forms. Once this happens, allow the dough to rest in the bowl for about 10 minutes.
Finish mixing the dough until it becomes smooth, then allow it to rest an additional 15-20 minutes.
So that the dough doesn't dry out, place some plastic wrap over the top of the dough.
Once the dough has rested, you'll roll it out as thin as you can.
If you have a pizza peel, now is the time to sprinkle a little cornmeal on it (or flour if you don't have cornmeal) so that the dough won't stick to it between the transfer from pizza peel to baking stone. If you don't have a pizza peel, simply place your dough on a baking sheet. You may want to lightly coat the baking sheet with cornmeal as well--it adds a nice crunch to the crackers.
Place the rolled out dough onto the pizza peel and then prick the dough all over with a fork to help prevent it from bubbling too much.
Take your olive oil and drizzle a little bit on top of the dough, spreading it evenly across the surface of the dough.
At this point, you want to add whatever seasonings you like. I simply sprinkled salt and garlic powder across mine. Then slide the dough off the pizza peel and onto your baking stone...or, if using a baking sheet, set it in the preheated oven.
Allow the dough to bake for 20 minutes. Check every 5 minutes or so and poke any bubbles with a fork. It's inevitable that your dough will have bubbles in it, but there's a big difference between dough that's been poked with a fork prior to baking than dough that hasn't been.
Dough baked without being pricked with a fork:
Dough baked that has been pricked by a fork:
Finally, cut or break the cracker bread into pieces. It crumbles a bit as you cut into it, but those little pieces are tasty, too! Pair this recipe with your favorite dip or salsa, or enjoy them plain. Tastes great with guacamole!
Monday, May 13, 2013
Meatloaf
Most people don't get overly excited about meatloaf. For me, it's always been a favorite. What makes this recipe more unique is that oatmeal is used rather than breadcrumbs or crackers as a filler. Tonight I decided to try the new trend of making individual meatloaf servings in a muffin tin rather than the usual loaf pan. It cut down the cooking time by 40 minutes...this is a good thing! :)
Ingredients:
1.5 pounds ground beef
3/4 c. oatmeal
2 eggs
1/4 c. onion, finely chopped
1 tsp. salt
1/4 tsp. black pepper
1 c. tomato juice (or tomato sauce)
**Note that I doubled this recipe
Oven Temperature: 350 degrees
Baking Time: In loaf pan: 1 hour; in muffin tin: 20 minutes
Start out by placing the ground beef in a large bowl.
Measure out the oatmeal and dump it in.
Crack the eggs straight into the bowl, too.
Add the salt, pepper, and onions.
Your bowl will look something like this!
Next, add the tomato juice or sauce. It's rare that I have tomato juice on hand, so I always substitute tomato sauce.
Now it's time to roll up your sleeves and get your clean hands dirty. You're going to use your hands (or a large spoon if you're squeamish), and thoroughly mix the meatloaf ingredients.
Once it's well-combined, if you're using a loaf pan, just go ahead and place it into your pan and into the preheated oven. If you're using a muffin tin, you can scoop the meat mixture into the tins with either a spoon, or use an ice cream scoop to help you have consistent amounts in each tin.
Bake the meatloaf for the appropriate time based on which baking pan/tin you are using.
Serve shortly after removing from the oven--while it's still hot! We are fans of ketchup on top of our meatloaf!
Thursday, May 9, 2013
Blueberry Muffins
We're on a blueberry theme here! The other morning I decided to make some muffins to go along with our breakfast. The recipe is fairly similar to my blueberry cream cheese coffee cake and, in fact, you could easily turn that recipe into a muffin recipe as well. The main difference between these two recipes is that for my muffin recipe, I omit the cream cheese and add in some cinnamon to the delicious topping. Feel free to play around with this recipe as you like--use whatever berries you have on hand, change up the spice in the topping...if you decide you even want to add the crumbly topping in the first place.
Oven Temperature: 400 degrees
Baking Time: 20-25 minutes
Muffin Ingredients:
1 1/2 c. flour
3/4 c. white sugar
1/2 tsp. salt
2 tsp. baking powder
1/3 c. veg oil or coconut oil (I used coconut oil)
1 egg
1/3 c. milk
1 c. blueberries (fresh or frozen; I used frozen)
Topping:
1/2 c. sugar
1/3 c. flour
1/4 c. butter, cut into pieces
1 1/2 tsp. cinnamon
*Note that I doubled this recipe and was able to make 22 fairly large muffins, after filling the muffin cups about 3/4 of the way full.
**As an extra aside, I took these pictures using my phone, so the quality may not be so great, but you will still get the idea!
In a large bowl, combine and stir all the dry ingredients. In a separate bowl, combine all the wet ingredients, mixing well, saving the blueberries to add at the very end. Add the wet ingredients to the dry and mix well. You will have a very thick batter. At this point, add the blueberries and do your best to fold them in.
Next spoon the batter from the bowl to your muffin cups. You can either grease your muffin tins or add the paper liners--I chose the liners and they worked very well.
Now you're going to make the topping for the muffins. In a small bowl, combine the sugar, flour, and cinnamon. Add the pieces of butter and cut into the dry mixture until you now have a crumbly topping. Using a large spoon, scoop the topping and generously pour it over the top of each muffin.
At this point, you will place the muffins into your preheated oven and allow them to bake. They are ready when they have turned golden brown. If you want to be extra sure, insert a toothpick or sharp knife in the center of a muffin to make sure it comes out clean.
Allow the muffins to cool for about 5 minutes before removing them from the tin and onto a wire cooling rack. Serve warm and enjoy!
Don't forget to add some butter! ;)
Subscribe to:
Posts (Atom)